


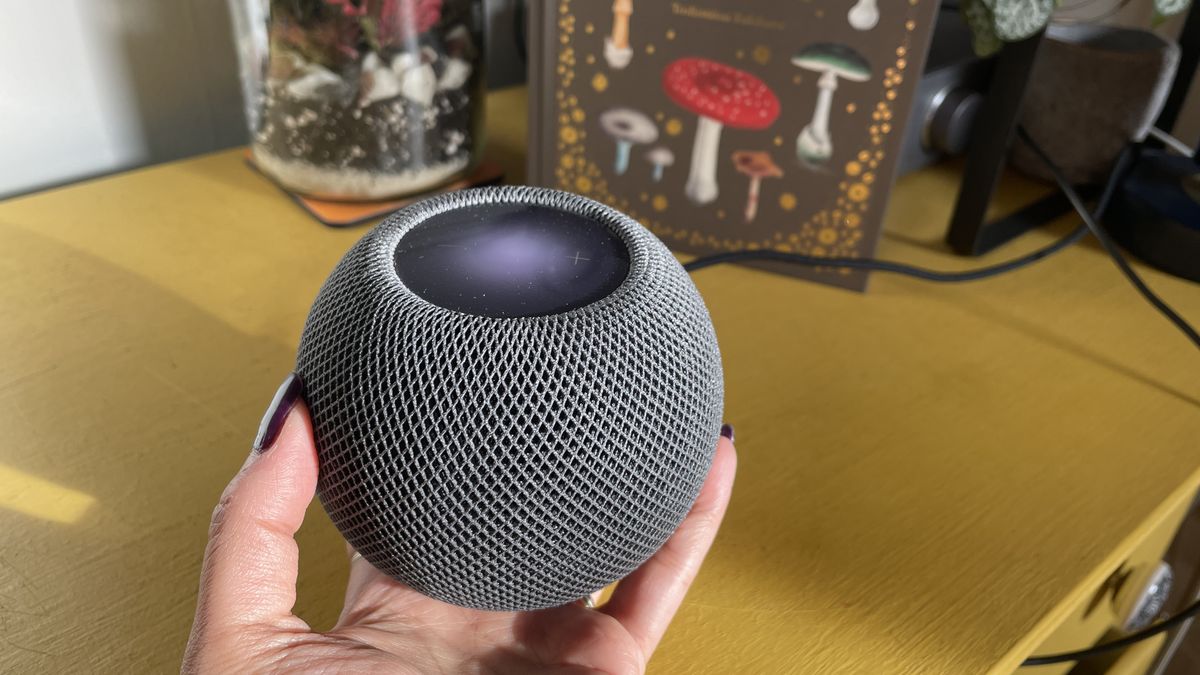
Over the past decade, speakers have quietly spread into nearly every corner of daily life. They sit on kitchen counters answering voice commands, travel in backpacks to parks and beaches, anchor home-office desks and line the shelves of living rooms. The category has grown more connected and more portable, but not more carefully maintained. Most owners treat a speaker as a sealed appliance that either works or doesn’t, and few know how to clean a speaker the safe way, even though dust and residue are among the most common causes of the slow, unexplained decline in sound that people blame on age. As devices become cheaper and more numerous, upkeep is one of the few habits that still separates a speaker that lasts from one that gets quietly retired.
The Speaker Boom Nobody Planned For
A generation ago, a household might have owned one stereo system, set up in a fixed spot and rarely moved. Today the same household may own a smart speaker in the kitchen, a Bluetooth unit for the garden, a soundbar under the television and a compact desktop pair. Each lives in a different environment, and each collects a different kind of grime.
The kitchen speaker absorbs cooking vapour. The garden speaker meets pollen, soil and damp air. The soundbar gathers dust along its top edge and in its vents. The desktop pair collects skin oils, crumbs and the fine particles that circulate around computers.
This diversity is the trend nobody planned for. Cleaning used to be a rare task for a single piece of equipment. Now it is a recurring chore across several devices, each with its own quirks, and the gap between how many speakers people own and how well they look after them keeps widening.
Five Myths About Speaker Care
Misunderstandings about maintenance cause more harm than neglect itself, so it helps to clear them up.
Myth one: if it still plays, it’s fine. Speakers degrade gradually, and the ear adapts. A unit can lose a lot of clarity before anyone consciously registers it. Working is not the same as performing well.
Myth two: dust only affects the look. Dust is more than cosmetic. On drivers it adds mass, on ports it restricts airflow, and in vents it traps heat. Each of these changes how the speaker performs.
Myth three: compressed air is the safest tool. Canned air is tempting, but a strong blast close to a cone can stretch or tear it, and the cold propellant can leave residue. A manual rubber bulb blower is far gentler.
Myth four: a damp cloth and a spray bottle will do. Liquid sprayed onto a speaker can travel through seams to the electronics. Moisture should go onto the cloth, never onto the device.
Myth five: newer speakers don’t need cleaning. Newer devices are often more exposed, thanks to fabric covers, mesh grilles and tiny microphone openings. Modern industrial design tends to look sleek, and sleek surfaces show wear fast.
What Dirt Does at the Component Level
Understanding the mechanics makes the cleaning routine feel less like a chore and more like common sense.
A speaker driver is built around a lightweight cone or dome, a voice coil, a magnet and a flexible suspension of surround and spider. When an electrical signal flows through the coil, it moves within the magnetic field and pushes the cone, which pushes air. Every part is tuned for low mass and free movement.
When contamination arrives, it interferes in predictable ways:
- Added mass from dust makes cones and domes sluggish, dulling high frequencies first.
- Oily residue binds dust into a crust that can stiffen the surround and restrict cone travel.
- Blocked ports and vents choke airflow, leaving bass weak or boomy.
- Dirty contacts around charging sockets, buttons and jacks create intermittent faults that look electronic but are physical.
- Trapped heat from clogged ventilation shortens the lifespan of amplifier components.
Each of these builds slowly and independently, which is why a speaker can show several unrelated symptoms at the same time.
A Bench-Style Cleaning Workflow
Technicians work methodically, and a home cleaner should too. This workflow suits most household speakers and rewards patience.
Step 1: Isolate. Switch the speaker off, unplug it, remove batteries where possible and disconnect every cable. Never clean a powered device.
Step 2: Inspect. Before touching anything, look at the speaker under good light. Note visible dust, stains, damaged fabric or blocked openings. Check the manual too, since some models have water-resistance ratings or specific care instructions.
Step 3: Dry-clean first. Start with a dry microfibre cloth on the exterior, then a soft brush on the grille. A clean paintbrush or make-up brush works well. Stroke in one direction, because scrubbing back and forth pushes particles into the mesh.
Step 4: Use controlled air. A rubber bulb blower dislodges debris from crevices without excessive force. Keep it at a modest distance from any exposed driver.
Step 5: Address stubborn marks. Lightly dampen a cloth, wring it until barely moist and wipe gently. Keep moisture away from seams, ports and buttons.
Step 6: Clear openings. Use a soft brush or dry cotton bud to remove lint from ports, vents and charging sockets. Do not push objects deep into any opening.
Step 7: Treat fabric with care. A lint roller or a very lightly damp cloth suits fabric grilles. Test a hidden spot first and avoid detergents, which can leave residue or discolour the material.
Step 8: Dry and retest. Allow several hours in a ventilated space if any moisture was used. Then reconnect and play a familiar track to compare the result.
The comparison is the satisfying part. Many people hear the difference immediately, particularly in vocals and high-frequency detail.
Smart Speakers and Voice Assistants: Special Cases
Smart speakers deserve their own section, because they combine sound output with sensitive input components.
Most contain several tiny microphone openings, usually on the top surface. When these clog with dust or lint, the device may mishear commands, respond late or fail to wake at all. Owners often blame software or the home network when the real culprit is a blocked opening smaller than a pinhead.
Clean these openings with a dry, soft brush and a gentle puff from a manual blower, working carefully so that debris is pushed out rather than in. Avoid liquids and avoid poking anything into the holes.
Fabric-covered smart speakers need extra caution. The covers collect dust, hair and kitchen grease, and aggressive rubbing can fray the weave. A lint roller is usually the safest first option. If a cover is removable, check the manufacturer’s guidance before washing it.
Finally, remember that these devices stay powered nearly all the time. Heat and static attract dust, so they often need attention more frequently than a speaker used occasionally.
Matching Your Cleaning Schedule to the Environment
There is no single correct frequency, because a speaker in a dusty workshop has different needs from one on a clean bookshelf. This guide offers a sensible starting point:
| Environment | Suggested light clean |
| Clean, climate-controlled living room | Every 2 to 3 months |
| Kitchen or near cooking areas | Monthly |
| Dusty, humid or smoky settings | Every 2 to 4 weeks |
| Outdoor or event use | After each use |
| Smart speakers and desk setups | Monthly |
| Stored equipment | Check before and after storage |
Adjust the rhythm based on what you see. If a quick wipe turns up a lot of dust, shorten the interval. If the speaker looks clean, stretch it.
Tools Worth Owning
You do not need a toolbox, but a small dedicated kit makes the habit easier to keep:
- Microfibre cloths for exteriors and light marks
- A soft brush, such as a clean paintbrush or make-up brush
- A rubber bulb air blower, the kind sold for camera lenses
- Dry cotton buds for ports and small gaps
- A lint roller for fabric grilles
- Electronics contact cleaner (optional), applied sparingly to a swab rather than sprayed
Store these together in one drawer. The easiest way to skip cleaning is to need ten minutes of searching before you can start.
Avoiding the Common Pitfalls
A few errors recur often enough to be worth repeating.
Strong household cleaners, solvents and alcohol-heavy wipes can dissolve adhesives, discolour finishes and degrade rubber surrounds. Plain water and a soft cloth are nearly always safer. Pressing on an exposed cone, even lightly, can dent or tear it, so if you cannot clean a driver without contact, leave it alone. Forcing a fixed grille can crack clips or the housing, so remove only grilles designed to come off. And strong vacuum suction near a driver can distort a cone, so use a soft brush attachment on the lowest setting if you vacuum at all.
Equally important is knowing when cleaning is not the answer. A burning smell, liquid inside the cabinet, a visibly damaged driver or distortion that persists after a careful clean points to a deeper fault. At that point a qualified technician is a better investment than further experimentation.
Prevention: The Habits That Reduce Cleaning
The best maintenance is the kind you need less often. A few placement and storage habits make a measurable difference.
Keep speakers away from cooking areas, open windows and damp walls. Raise floor-standing units slightly so that dust and spills are less likely to reach them. Cover idle equipment with breathable fabric rather than plastic, which traps moisture and encourages mould. Use a surge protector, since unstable power stresses amplifiers and makes them run hotter, which draws in more dust through vents.
For portable units, wipe them after outdoor use and dry them thoroughly before storage. Avoid leaving them in a hot car, where heat can warp materials and shorten battery life.
Why Longevity Is Becoming a Tech Value
There is a larger story behind all of this. Consumer attitudes toward electronics are shifting. Conversations about repairability, refurbished markets and e-waste have moved from specialist circles into mainstream discussion, and many buyers now ask how long a product will last, not only how quickly it performs.
Maintenance sits at the centre of that shift. A speaker that is kept clean tends to sound better for longer, holds more resale value and avoids the cost and waste of premature replacement. Even a simple illustration shows the logic: a $200 speaker replaced every three years costs roughly $67 a year, while one that lasts six years costs about $33 a year. The numbers are illustrative, but the principle holds at any price point, because doubling useful life halves annual cost.
For anyone who covers or follows technology, this is a useful reminder that innovation is not only about new releases. It is also about getting full value from what already exists.
Final Thoughts
Speakers are now among the most common devices in our homes, and among the least cared for. They collect dust, grease and moisture, and they respond with gradual, easily misread symptoms: duller sound, weaker bass, unresponsive controls and occasional glitches.
The remedy is neither expensive nor complicated. A soft brush, a clean cloth, a manual blower and a bit of regularity can restore performance that many people assume is gone for good. Combine that with sensible placement and storage, and you reduce both the effort and the cost of ownership over time.
Before you retire a speaker that has lost its spark, inspect it, clean it gently and listen again. The most overlooked upgrade in consumer audio is often just a well-kept device.
